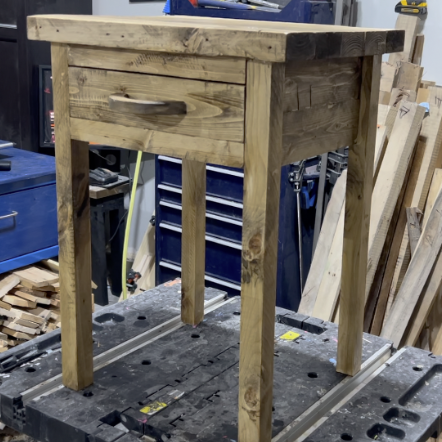
Night stand made from 2x4s scraps found by the road. Can be made in a few hours and sells on the marketplace in no time.
Preparing the wood – Remove all nails and screws
Planing the wood to an even thickness – Run the wood thru the planer to get them all down to the same thickness
Ripping the wood to an even width – Rip each 2×4 to 3″
Cutting the 2x4s to needed lengths
- Top : 5x 19” , 3” wide
- Legs : 4x 24”, ripped in half to 1.5” wide
- Drawer : 2x 12” , resawed in half to 0.75”, 3” wide
- Drawer front : 1x 13.5”, ripped in half to 0.75”, 2nd part used for the handle
- Drawer handle : 2nd board from the drawer front Left and right panels : 2x 12”, resawed in half to 0.75”, 3” wide
- Rear panel : 1x 13.5” , resawed in half to 0.75”, 3” wide
- Over and under drawer : 1x 12”, ripped in half to 1.5” wide
Gluing the top pieces together – Make sure you puit the nicest edges on the sides
Resawing – Resaw the 2×4 cuts into 1x4s. Raise the blade to around 60% of the height of the wood for maximum safety
Ripping the legs on the table saw – Rip the 2x4s into 2x2s (1.5″x1.5″)
Preparing the drawer – Removing 1/4″ from the drawer height
Glueing the 1×4 panels – The end result will be three, 6″ panels
Making the drawer handle – We will cut this on the bandsaw then sand it to a nice finish
Assembly – Follow the instructions in the video to assemble. We’re using pocket holes for every joint.
Weathering – By running the jig saw in reverse agains the wood, we create weathering that will pop out during staining
Sanding – Sand at 120 grit very lightly to not remove your weathering. Finish at 220 grit to get a smooth surface for the staining.
Prestaining – Prestaining helps the stain absorbe uniformly, more so on soft woods like this pine.
Staining – This is where the weathering will appear and pop out as great features to your table.
Finishing – I finished this using a acrylic polyurethane.
Done! – Please follow my youtube channel for more content like this!